Molding and stitching leather for footwear involves a combination of techniques that leverage the material’s natural flexibility and durability. Below is an overview of the process:
1. Leather Molding for Footwear
Leather molding gives the upper part of the shoe its shape and ensures it conforms to the shoe last for a proper fit.
Steps in Molding Leather:
- Material Preparation:
- Moistening: The leather is dampened using water or steam to make it pliable and easier to mold.
- Conditioning: A leather conditioner or softener may be applied to prevent cracking during molding.
- Cutting:
- Patterns for the shoe upper and other components are cut from leather sheets using dies, scissors, or precision cutting machines.
- Shaping:
- The leather pieces are stretched and shaped over a shoe last (a 3D mold resembling a foot).
- Hand-Stretching or Machine-Assistance: In small-scale manufacturing, artisans manually stretch the leather, while larger operations use mechanical presses or vacuum molding machines.
- Drying and Setting:
- The leather is left to dry on the last, allowing it to “set” into the desired shape.
- Heat may be applied during drying for firmer shaping, but care is taken to avoid damaging the material.
- Reinforcement:
- Reinforcements like stiffeners or counters are added to areas like the heel and toe to maintain the shape and add durability.
2. Leather Stitching for Footwear
Stitching connects leather components to form the shoe upper and secure it to other parts of the shoe.
Key Techniques in Stitching Leather:
- Preparation for Stitching:
- Marking Stitch Lines: Patterns are traced onto the leather using templates or stencils.
- Punching Holes: Awls or leather punches create holes for easier stitching, especially for thick or stiff leather.
- Edge Skiving: Edges may be skived (thinned) for smoother seams and easier stitching.
- Types of Stitches:
- Lockstitch: Commonly used in industrial machines for durability and precision.
- Saddle Stitch: A hand-stitching technique for decorative and strong seams.
- Flat Seam Stitch: Ensures seams lie flat and are comfortable against the foot.
- Assembly and Joining:
- Stitching the Upper: Leather panels for the vamp, quarters, and tongue are sewn together.
- Lining Attachment: Linings are stitched to the upper for comfort and reinforcement.
- Decorative Stitching: Optional for enhancing the aesthetic, like broguing or topstitching.
- Edge Finishing:
- After stitching, edges are often polished or coated with edge dye for a refined look.
- Overlapping or raw edges may be sealed with adhesives to prevent fraying.
- Stitching the Upper to the Sole:
- For stitched constructions (e.g., Goodyear welt, Blake stitch), the upper is stitched directly or indirectly to the sole for added durability.
Challenges and Solutions in Leather Molding and Stitching:
- Challenge: Leather can crack or stretch unevenly.
- Solution: Proper conditioning and careful cutting ensure uniformity and minimize waste.
- Challenge: Thick leather can be hard to stitch.
- Solution: Use specialized heavy-duty needles and machines, or pre-punch holes for hand-stitching.
- Challenge: Maintaining precise alignment during stitching.
- Solution: Use templates, marking tools, and stitching clamps or jigs.
Tools and Equipment:
- Molding: Shoe lasts, heat guns, vacuum presses, and mallets.
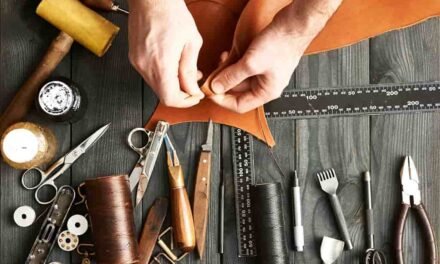
- Stitching: Sewing machines (manual or industrial), awls, leather punches, and stitching clamps.
By combining these techniques, skilled artisans or machines can produce durable, aesthetically pleasing footwear that aligns with design specifications and functional requirements.


